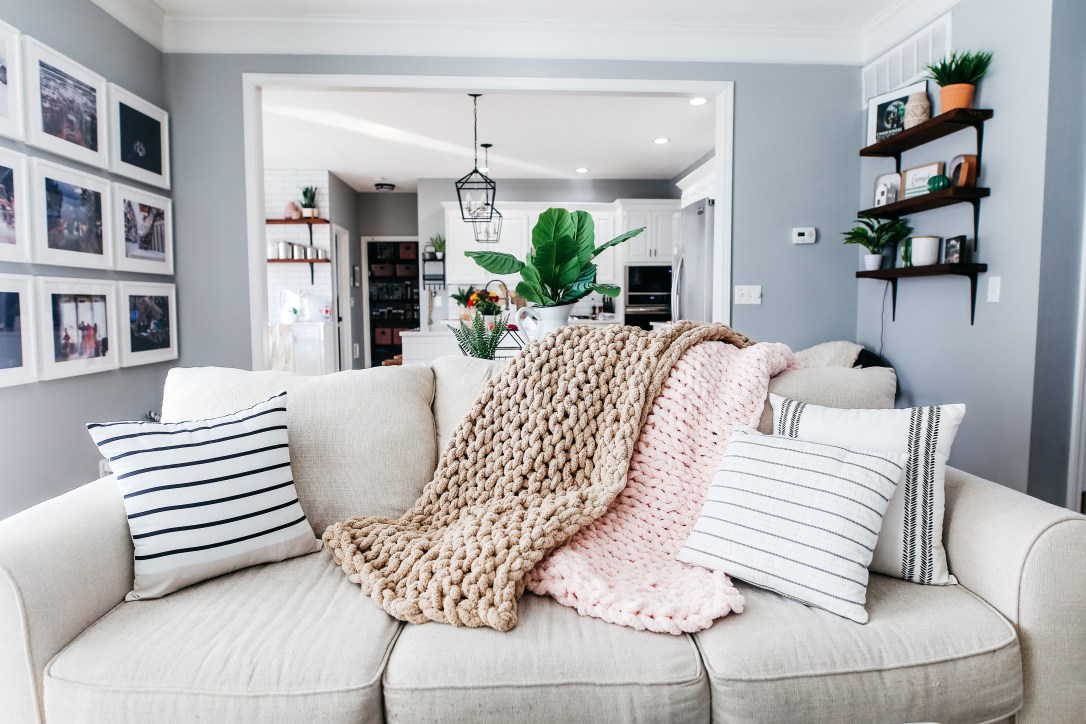
You’ve all seen the super soft and cozy, chunky knit blankets. You’ve wanted one until you checked out the price tag!! These things sell for over $100 lots of places.
What if I told you, you could totally make one yourself.
That it’s super easy.
Only takes a couple hours.
And only costs $30-45!!
WHAT?!!
It’s true and I’m going to show you exactly how!
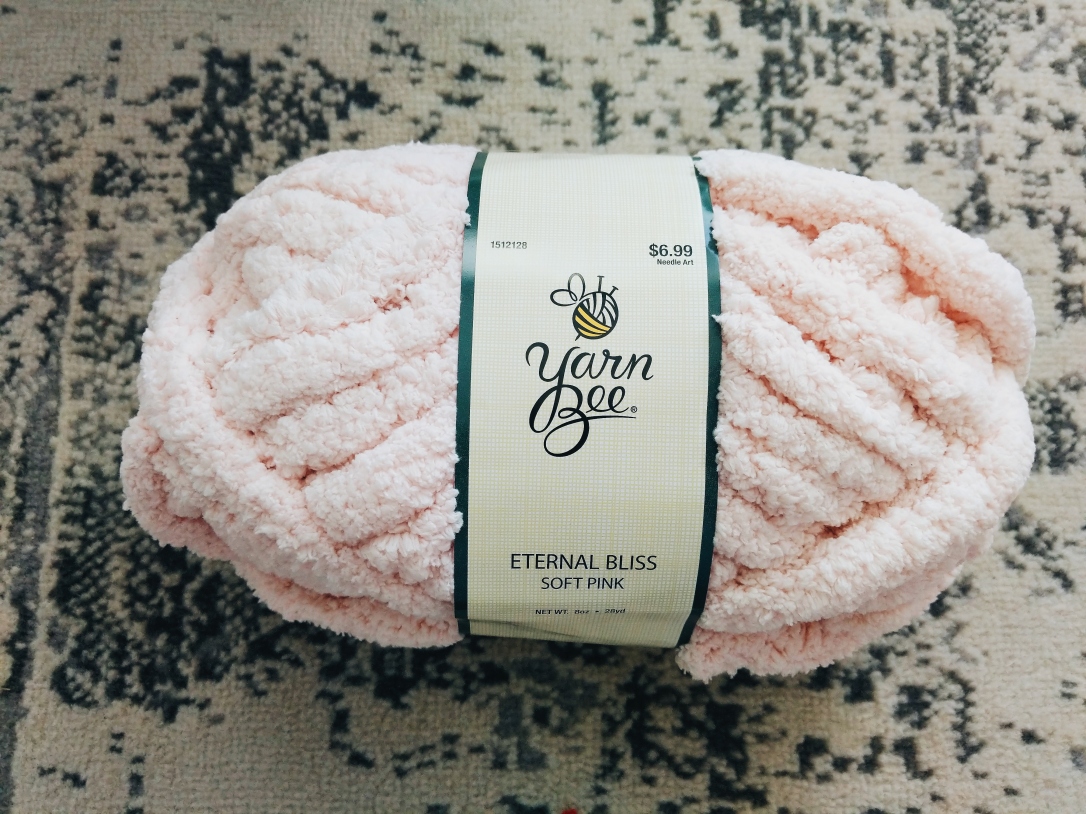
All you need is at least 6 skeins of thick, soft blanket yarn, scissors, a large flat area to work and a few of your favorite Netflix shows!
This is the yarn I used. I got mine at Hobby Lobby, but you can find it at any craft store and even Walmart! Obviously, the more skeins of yarn you use, the bigger the blanket. Use those coupons or wait for the good sales!
I’ve put together a series of videos to help show you the process of making your own blanket step-by-step. I’ve decided to break the video into parts like this so you can easily check back on any part that you’re having trouble with.
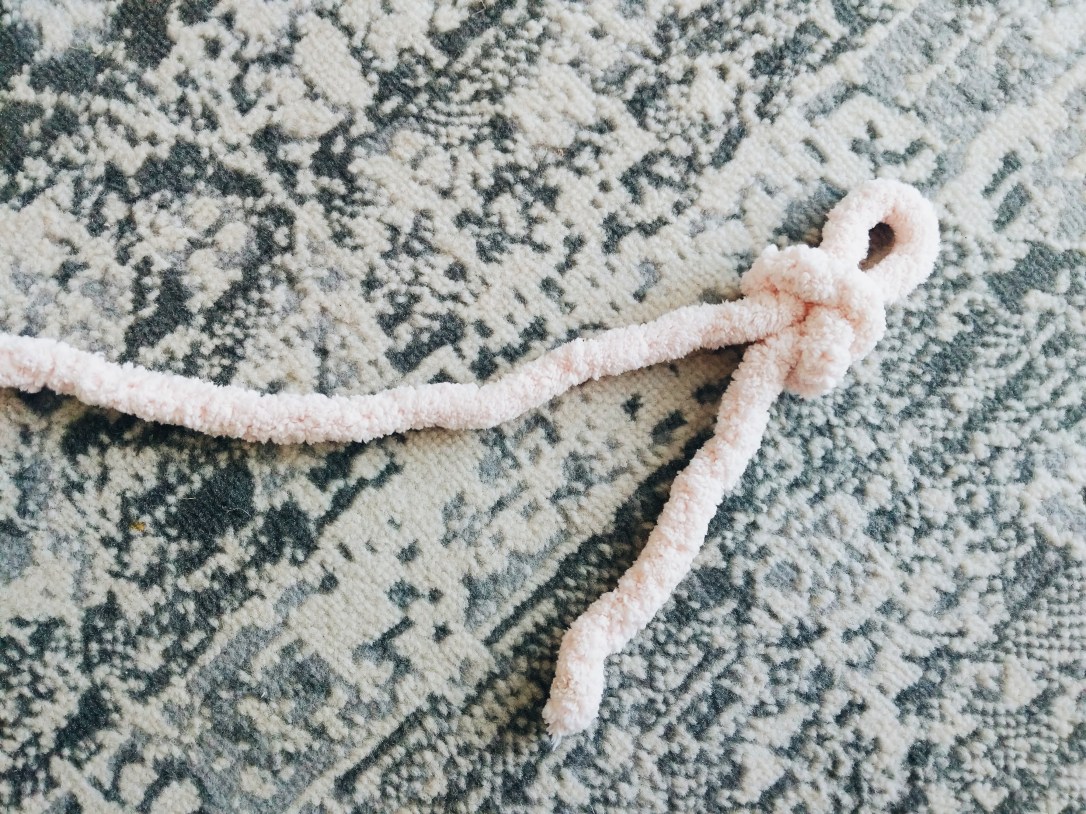
Step one is to create your starting knot. Loop one end around your hand and pull the long end through. Slide to tighten.
Your starting knot should look like this. Don’t worry about the extra tail end, I’ll show you how to work that in at the end.
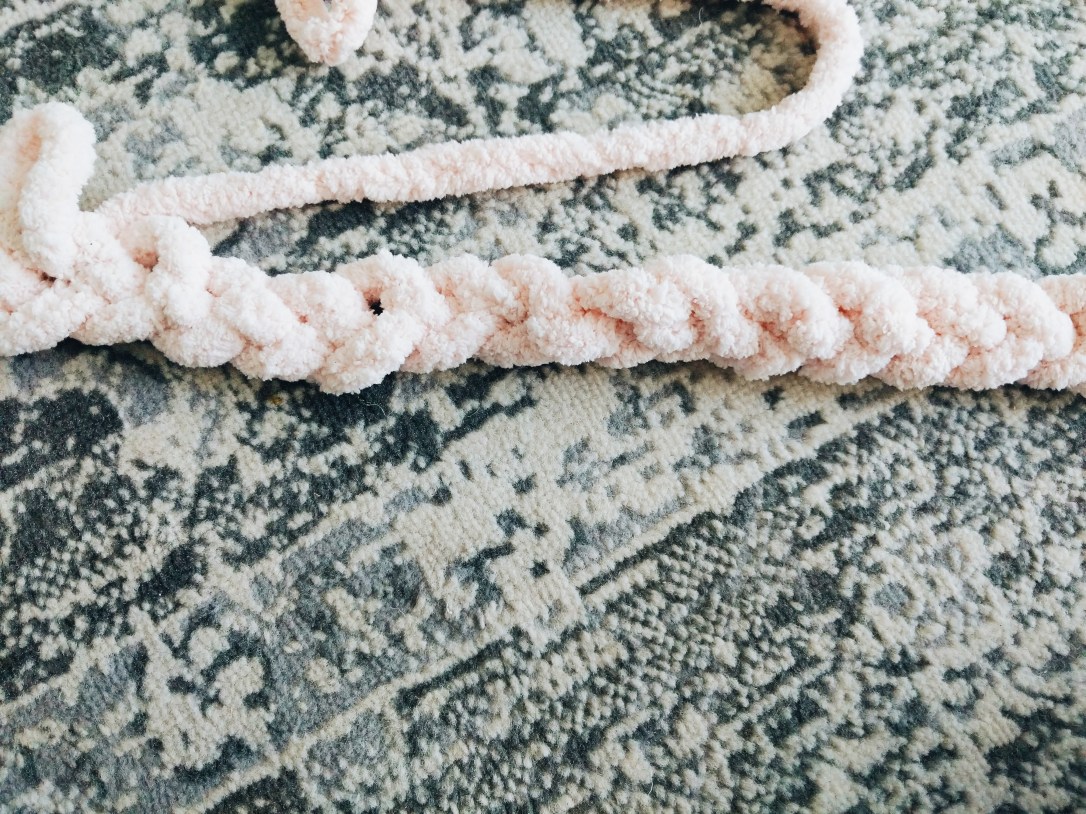
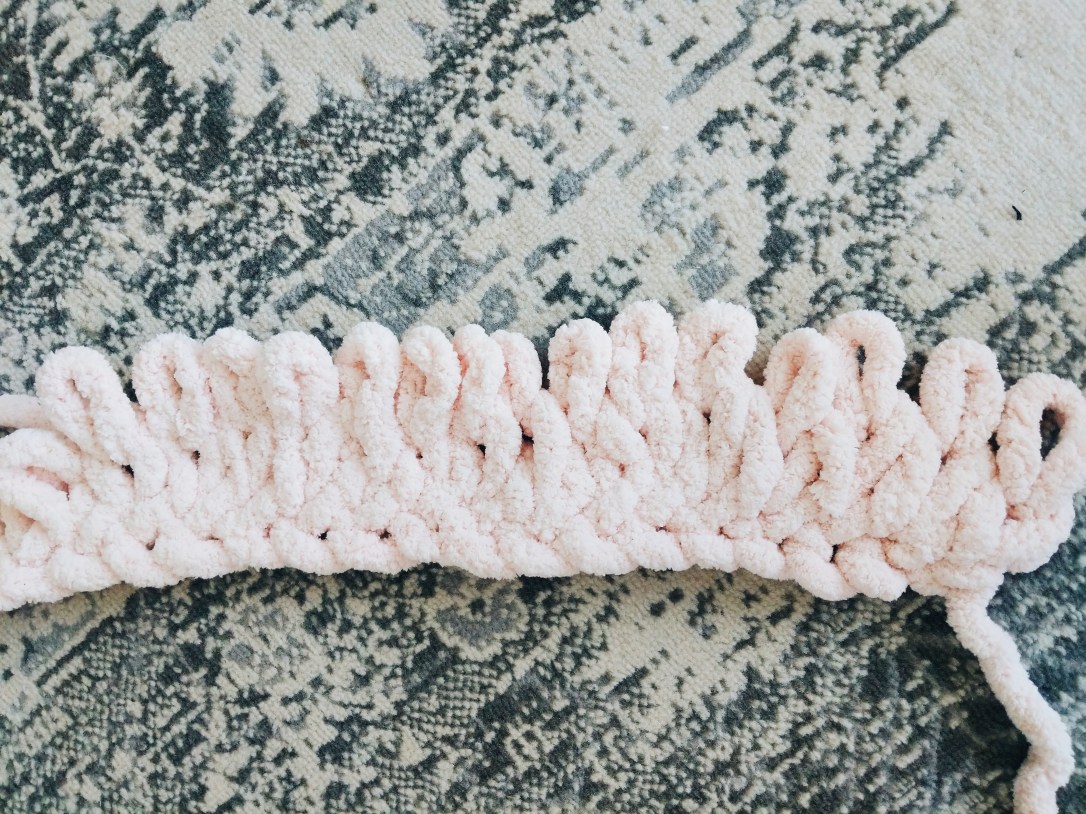
The next step is to make your first row which will create a finished border for your blanket. Reach through your starting loop and pull the long end through, creating a second, similar sized loop. Repeat this process until you’ve reached your desired length or width of your blanket. Count your loops because you will want to be sure to create the same number of loops in each consecutive row. I would recommend 20-30 loops. Your completed first row should look like a braid.
To start your second row, make another loop on the end, this time pulling it upwards. Move your skein to the other side of your blanket so you can follow along behind it. Continue to make upward facing loops by pulling the yarn through each loop of your starting row and pulling up. It is important to keep all of your loops about the same size. Do this all the way down to the other end of your starting row.

Turn your skein again and head back the other way. Pull the yarn up through each loop creating another row of upward facing loops. And repeat, repeat, repeat! Back and forth, creating row after row until you’ve used all but one rows’ worth of yarn. It should look like this as you go.
Here’s a demonstration on how that looks. Whenever you come to the end of a skein, simply knot on the fresh skein, cut off any excess and keep going. The knots will get lost in your braids.
When you come close to the end of your last skein of yarn, leaving enough for at least one full row of loops, you will need to “cast-off” your yarn. Which is just a fancy knitting term for creating a finished end. For this last row, you will create a braid pattern similar to your very first starting row. Continue to pull the yarn up through the loops below, but this time, you will also pull your newly created loop through the previous loop. Clear as mud, right? Here are some pictures and video to help explain what that looks like.
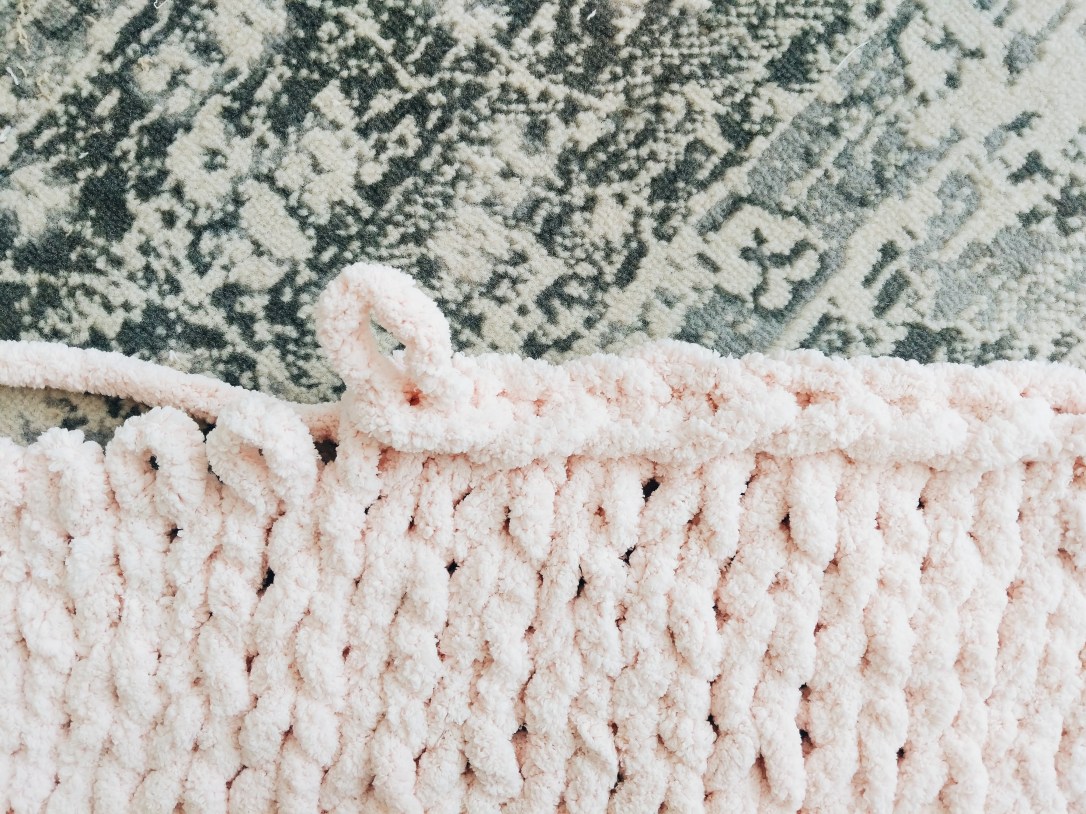


Once you’ve reached the very end of your last row, simply use another shoelace knot to close the end. Weave any access yarn at the end and beginning of your blanket up into the braid to hide it.
That’s it! You’ve made it! You’re done! And now you’re addicted, right?! We’re all going to be so cozy this winter! {continue below for a note on size}

I will mention that the size and shape of your blankets will vary depending on the number of loops/row you choose to do, by the size of loops you create and also how tightly you pull each loop together.
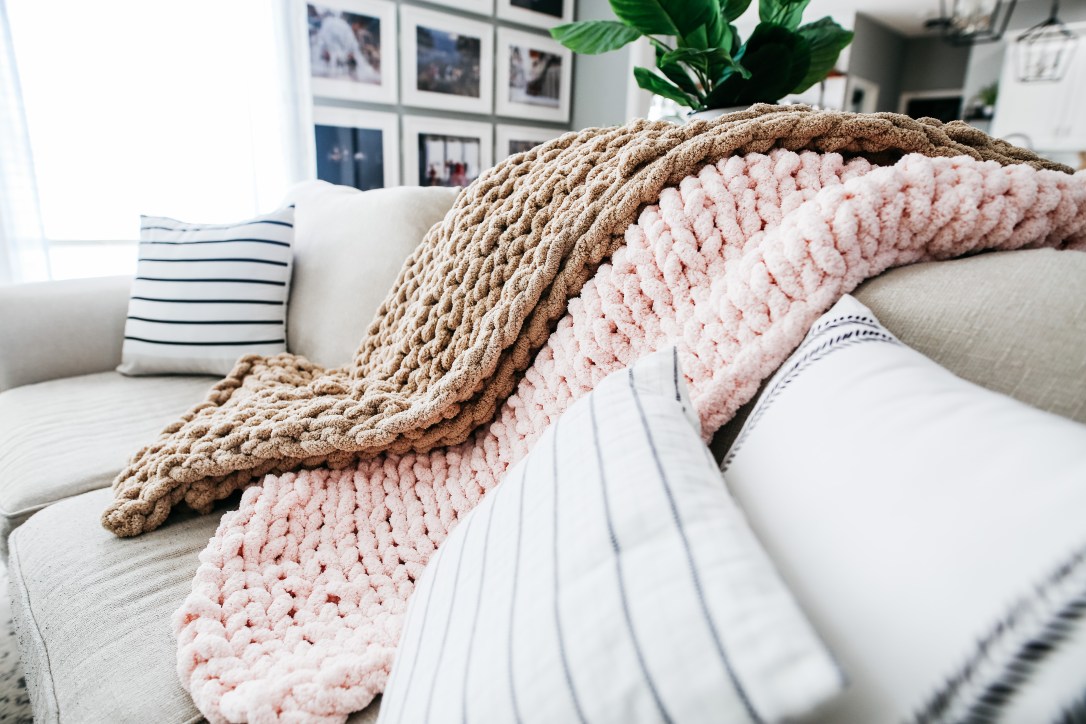
Both of these blankets were made with the same amount of yarn and also with the same number of loops/row (30), but I did longer, looser loops with the tan (44″x 65″) and smaller, tighter loops with the pink (38″x 55″).

Happy knitting!!! Please send me any questions you have while you create your own! Check back for more simple DIY projects!
